
Pocono
Moderator
Grub Pattern - Step-by-Step
As descsibed by T. Pryce-Tannatt in his book: How to Dress Salmon Flies; A Handbook for Amateurs.
OK, here's the step-by-step for the first pattern; the Grub. I'm going to tie it with some variations, because I'm in 2010, not in the late 1800's when this pattern was developed. We have some materials and tools that didn't exist at that time and I plan to make use of them whenever I can, since I think that you all routinely make use of them, too. For example, whereas most flies were tied free-hand at that time, I like to use a vise!
I'm using a Partridge Bartleet CS10/1 hook; #6 and Danville Flymaster 6/0 thread. The rest of the materials are as I listed previously.
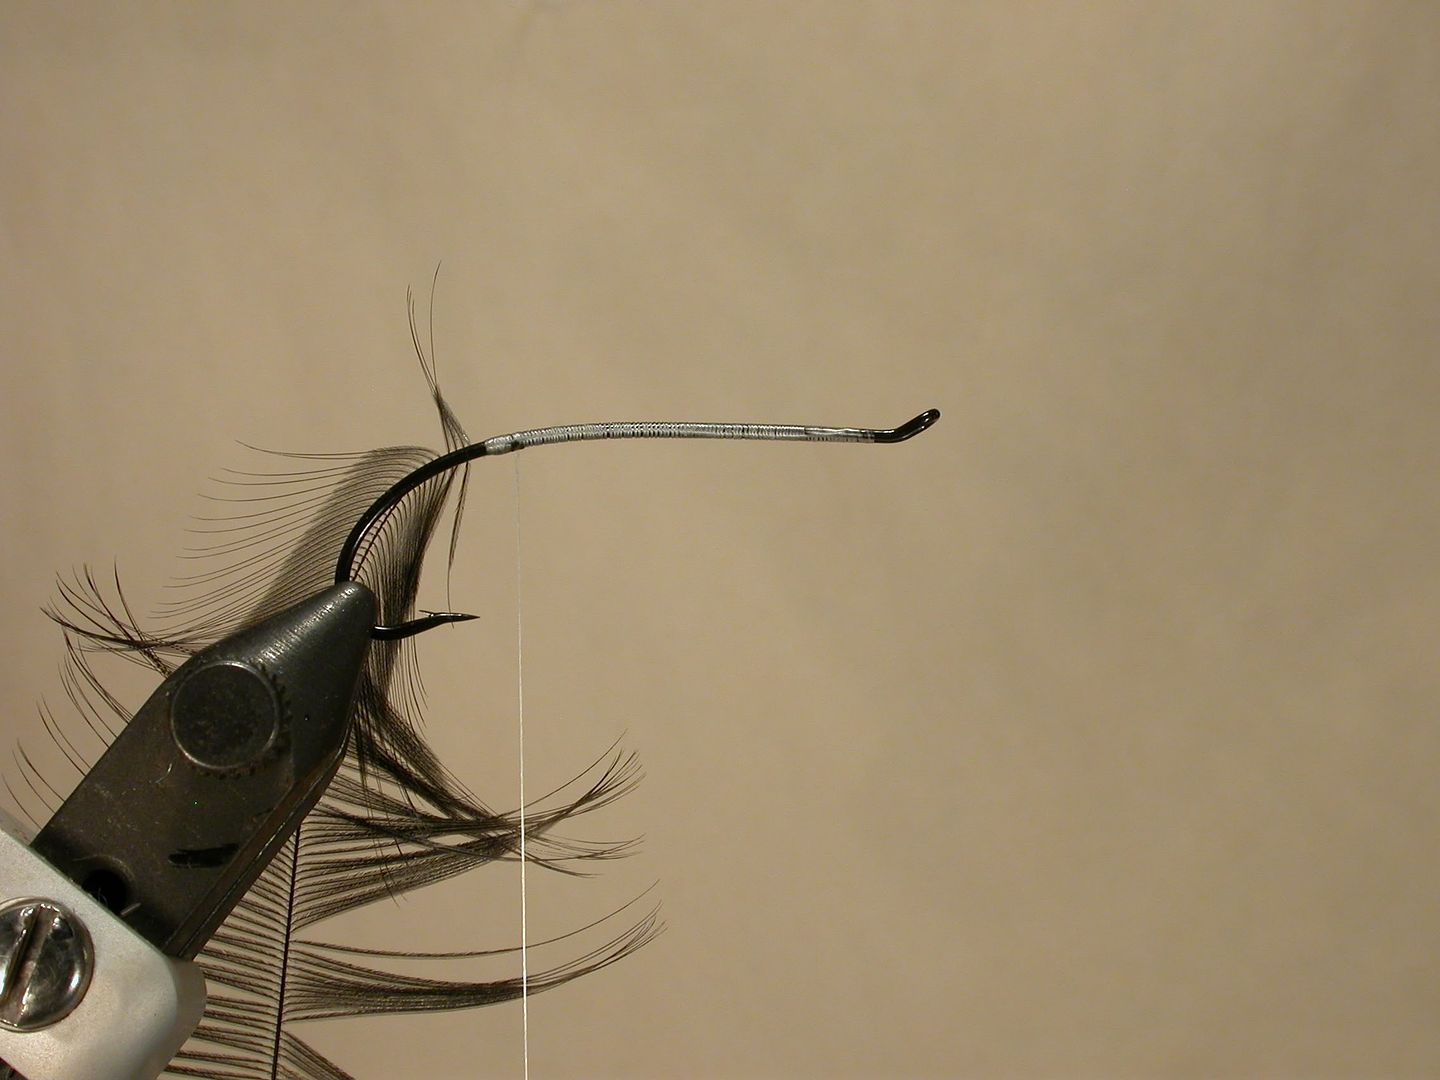
1. Mount the hook and thread it using the white thread; take it back to the hook point (don't forget to flatten the thread)
[I'm going to post some helpful hints in a separate entry to this thread; flattening thread will be one of them.]

[Here's an aside: For this fly it really doesn't matter whether or not you use white thread or black. You're going to be switching to black thread after the body's been crafted. The primary reason for using white thread is that for some body materials; silk in particular, the thread color bleeds through the body material when the fly is wet. We're going to be using yarn for the body, so bleed-through isn't an issue for this tie. But, from my standpoint, it's good to get into the habit of using a white thread until the body of the fly is formed. Your choice.]
2. Tie in the folded hackle by the anchor on the underside of the hook; from the back toward the front using no more than 5 flattened wraps (folding hackle and tying it in will be another of the hints).
3. Tie in the silver tinsel by the stripped end on the underside of the hook. Back off 2 of the wraps that you used to tie in the hackle and then tie in the tinsel with 3 wraps toward the tail (you want the tinsel to be right up against the hackle stem; this is the relationship that these two materials will have throughout this pattern, so get a good start at this first step). Then wind the thread forward; each wind butt up against the other, up to the point where the eye doubles back on itself.
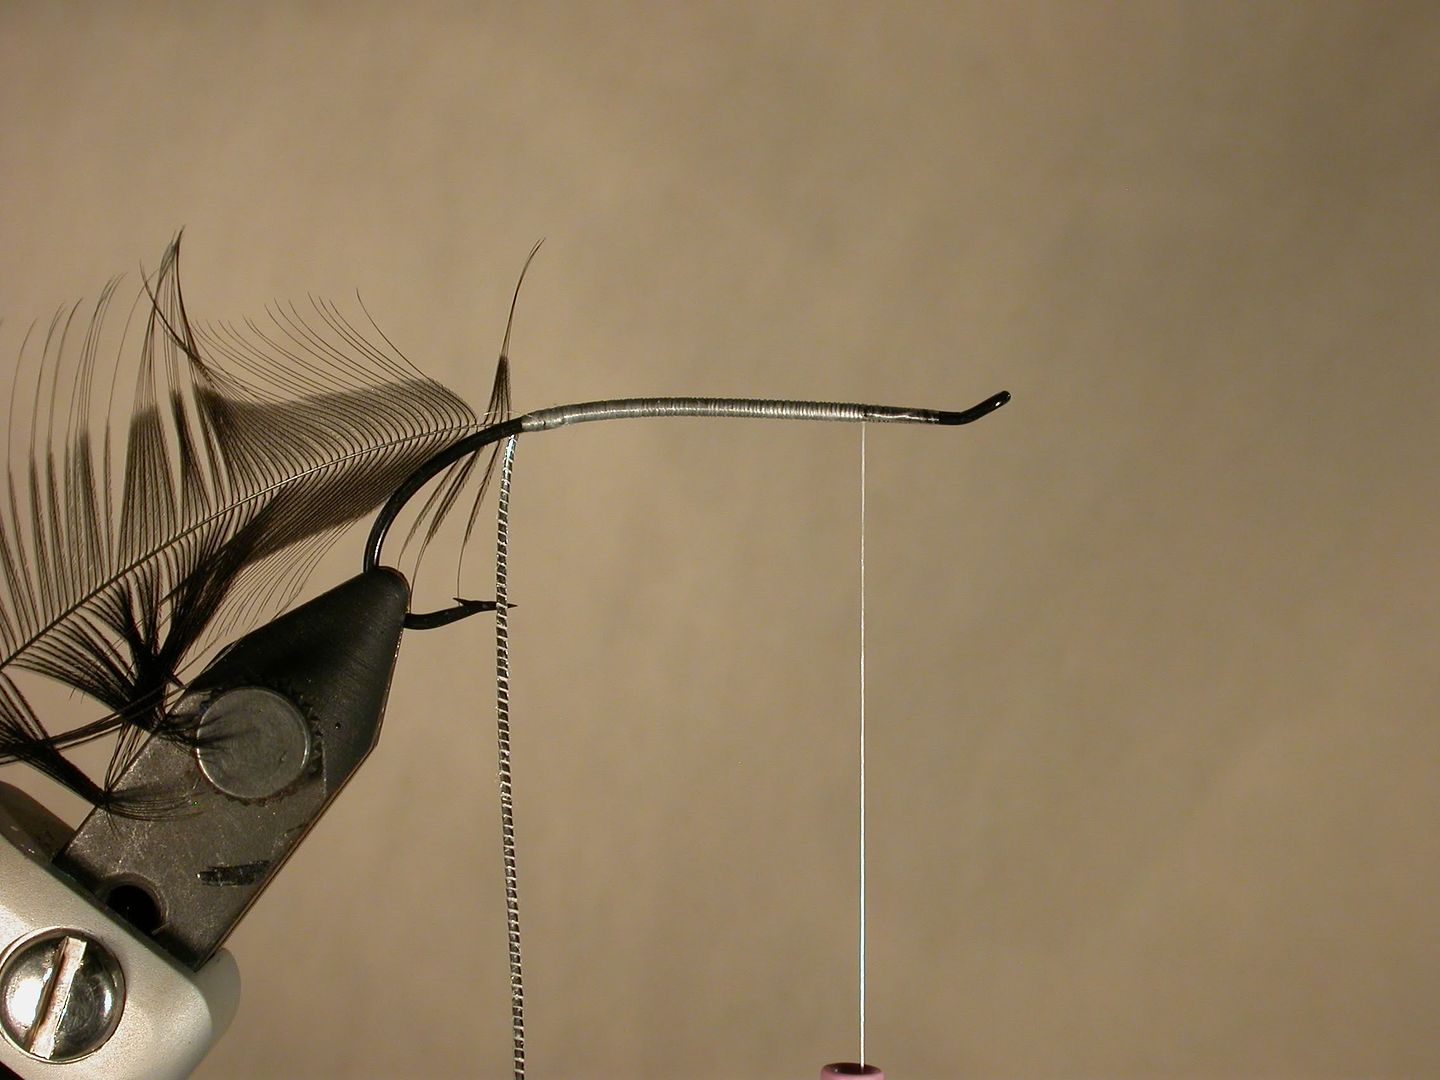
4. Tie in the red yarn with 3 flattened wraps

5. Wind the yarn back to the point where the tinsel and hackle are tied in; then pick up both the hackle and the tinsel, hold them slanted towards the eye and take one wrap of yarn behind both of them.
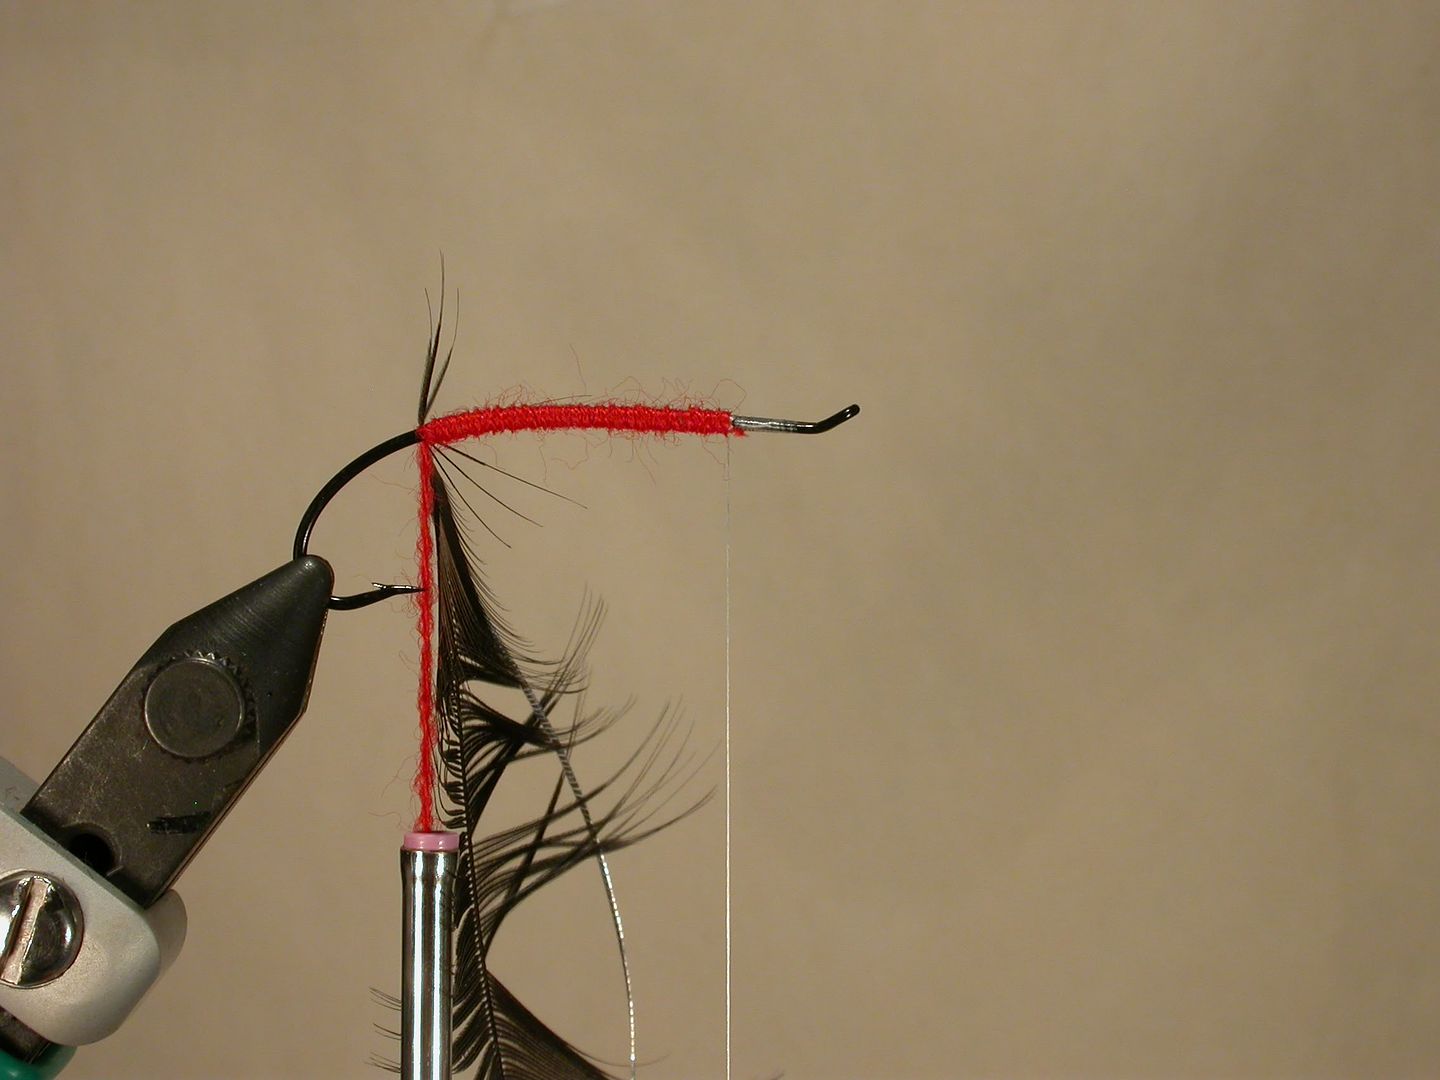
6. Then wind the yarn back toward the front with butt winds. Take it to a place half way up the reversed eye, clip both butts and tie it off with 3 flattened wraps.

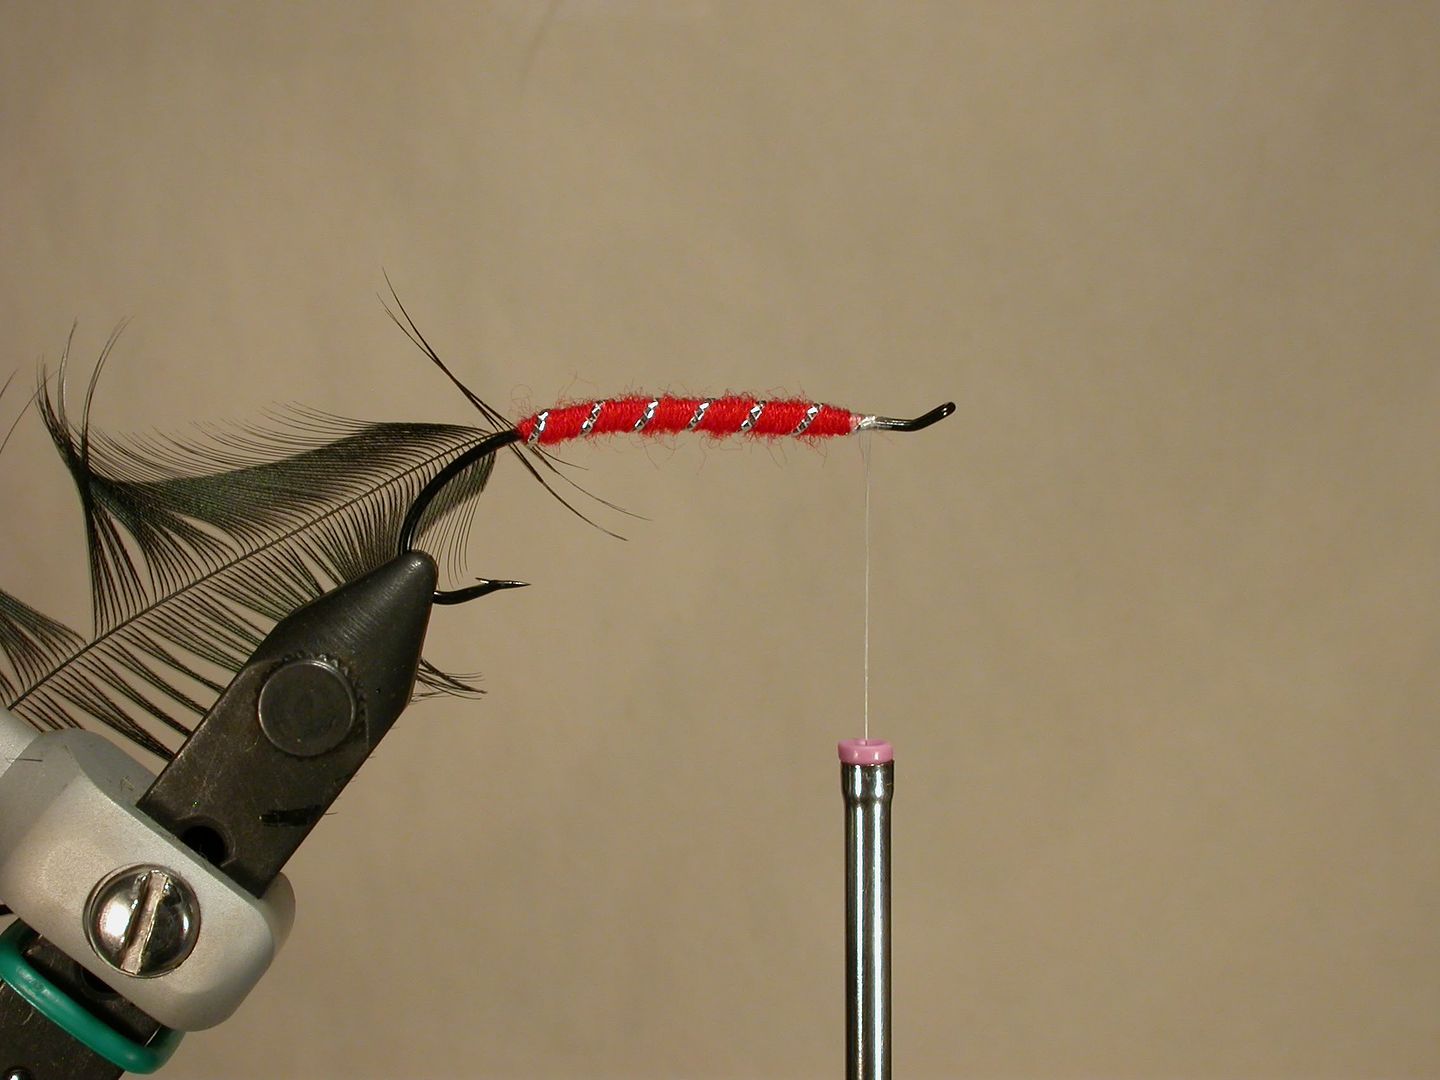
7. Next, wind the tinsel up the body in even spiral winds (the spacing of the tinsel winds is up to you; generally, if you have a short hackle, then you use wide spaces, if you have a long hackle, then you can use tighter spaces). Tie off the tinsel with 3 flattened wraps.
8. Change to the black thread (if you started with the white). I use a 3-whip finish to tie off the white thread and then mount the black thread as I did at the start of the tie.

9. Now, wind the folded hackle up towards the eye; placing the stem just behind the tinsel all the way up (you can actually use the tinsel as a guide for wrapping the hackle). When you get to the forward end of the body, you can either tie the hackle off immediately, or if you want a fuller, collar-type look, you can put on 2-3 more wraps, butt to each other, and then tie it off with 3 flattened wraps. I like this pattern dressed more sparsely, so in my tie, I tied it off with a single colar wrap.
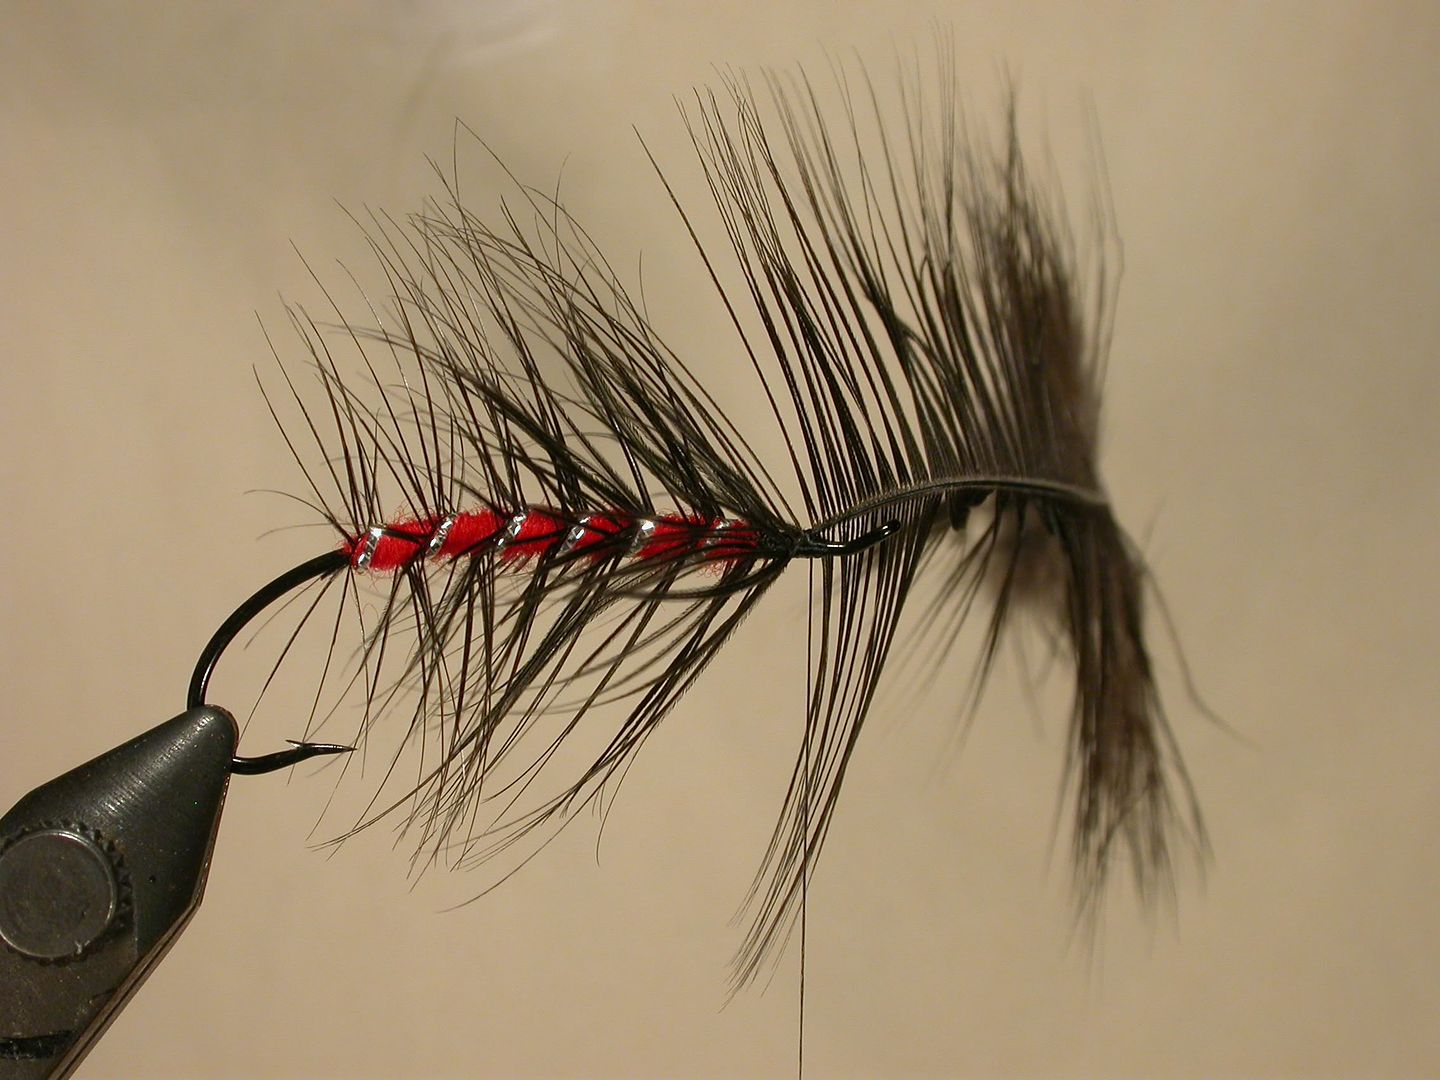
10. Form the head with the black thread (head styles differ on different patterns and according to each tyer's preference; but many people will say that the quality of the head is a surrogate for the quality of the entire tie; so take your time and get the look that you want).
[Aside: In many of the other patterns that we'll be tying up, there will be a challenge to keep the head small enough to match the proportions of the fly. This is almost never an issue with a Grub pattern; so enjoy the current situation.]
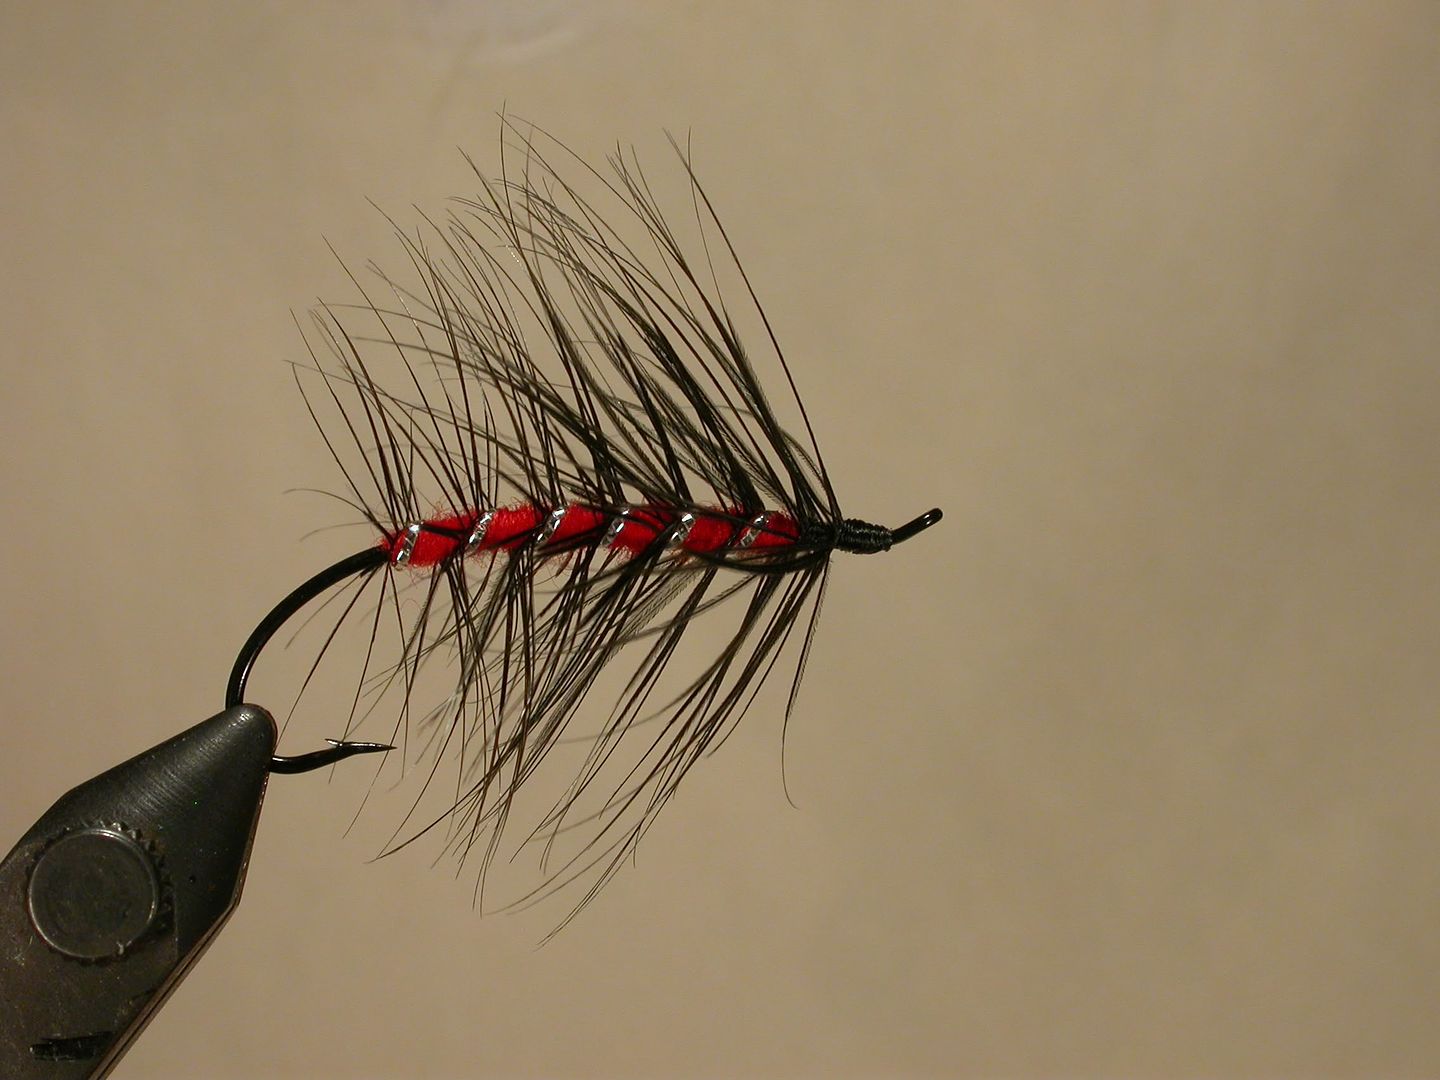
11. Varnish the head to get a glossy appearance. I use SHHAN (introduce to me by Joni a couple of years ago - great product; it's Sally Hansen's Hard As Nails nail polish in clear). I use 3 coats, the first one heavy (because it sinks in) and the next two light.
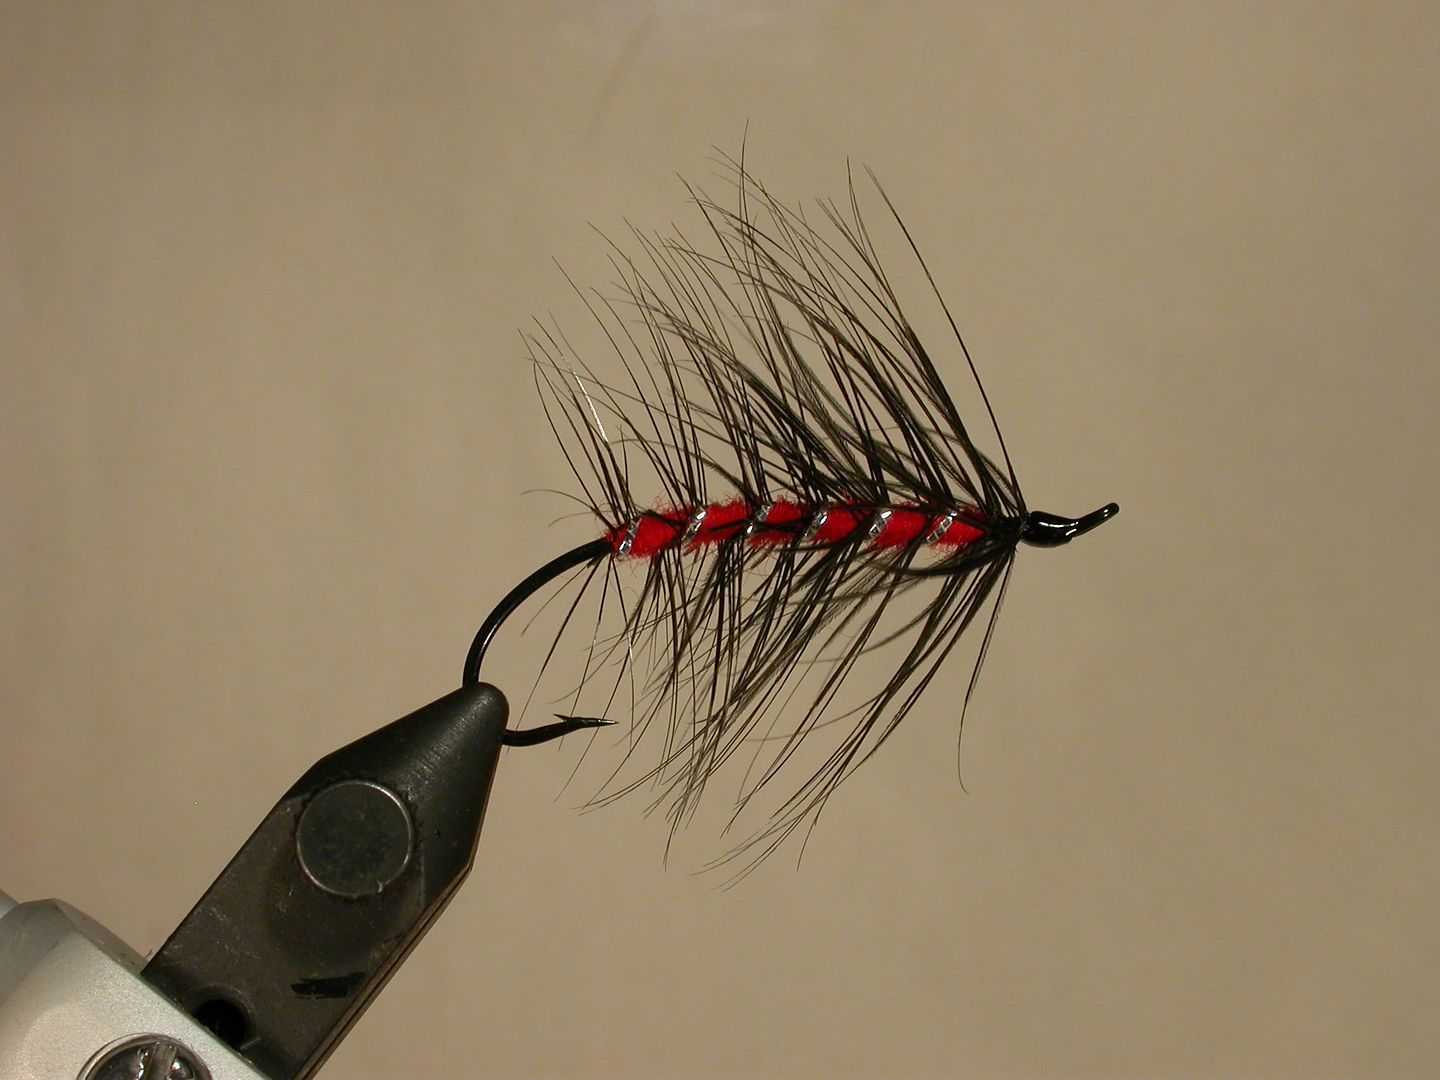
And that's it! You've just tied up the first Salmon fly pattern; the Grub.
Pocono
As descsibed by T. Pryce-Tannatt in his book: How to Dress Salmon Flies; A Handbook for Amateurs.
OK, here's the step-by-step for the first pattern; the Grub. I'm going to tie it with some variations, because I'm in 2010, not in the late 1800's when this pattern was developed. We have some materials and tools that didn't exist at that time and I plan to make use of them whenever I can, since I think that you all routinely make use of them, too. For example, whereas most flies were tied free-hand at that time, I like to use a vise!
I'm using a Partridge Bartleet CS10/1 hook; #6 and Danville Flymaster 6/0 thread. The rest of the materials are as I listed previously.
1. Mount the hook and thread it using the white thread; take it back to the hook point (don't forget to flatten the thread)
[I'm going to post some helpful hints in a separate entry to this thread; flattening thread will be one of them.]
[Here's an aside: For this fly it really doesn't matter whether or not you use white thread or black. You're going to be switching to black thread after the body's been crafted. The primary reason for using white thread is that for some body materials; silk in particular, the thread color bleeds through the body material when the fly is wet. We're going to be using yarn for the body, so bleed-through isn't an issue for this tie. But, from my standpoint, it's good to get into the habit of using a white thread until the body of the fly is formed. Your choice.]
2. Tie in the folded hackle by the anchor on the underside of the hook; from the back toward the front using no more than 5 flattened wraps (folding hackle and tying it in will be another of the hints).
3. Tie in the silver tinsel by the stripped end on the underside of the hook. Back off 2 of the wraps that you used to tie in the hackle and then tie in the tinsel with 3 wraps toward the tail (you want the tinsel to be right up against the hackle stem; this is the relationship that these two materials will have throughout this pattern, so get a good start at this first step). Then wind the thread forward; each wind butt up against the other, up to the point where the eye doubles back on itself.
4. Tie in the red yarn with 3 flattened wraps
5. Wind the yarn back to the point where the tinsel and hackle are tied in; then pick up both the hackle and the tinsel, hold them slanted towards the eye and take one wrap of yarn behind both of them.
6. Then wind the yarn back toward the front with butt winds. Take it to a place half way up the reversed eye, clip both butts and tie it off with 3 flattened wraps.
7. Next, wind the tinsel up the body in even spiral winds (the spacing of the tinsel winds is up to you; generally, if you have a short hackle, then you use wide spaces, if you have a long hackle, then you can use tighter spaces). Tie off the tinsel with 3 flattened wraps.
8. Change to the black thread (if you started with the white). I use a 3-whip finish to tie off the white thread and then mount the black thread as I did at the start of the tie.
9. Now, wind the folded hackle up towards the eye; placing the stem just behind the tinsel all the way up (you can actually use the tinsel as a guide for wrapping the hackle). When you get to the forward end of the body, you can either tie the hackle off immediately, or if you want a fuller, collar-type look, you can put on 2-3 more wraps, butt to each other, and then tie it off with 3 flattened wraps. I like this pattern dressed more sparsely, so in my tie, I tied it off with a single colar wrap.
10. Form the head with the black thread (head styles differ on different patterns and according to each tyer's preference; but many people will say that the quality of the head is a surrogate for the quality of the entire tie; so take your time and get the look that you want).
[Aside: In many of the other patterns that we'll be tying up, there will be a challenge to keep the head small enough to match the proportions of the fly. This is almost never an issue with a Grub pattern; so enjoy the current situation.]
11. Varnish the head to get a glossy appearance. I use SHHAN (introduce to me by Joni a couple of years ago - great product; it's Sally Hansen's Hard As Nails nail polish in clear). I use 3 coats, the first one heavy (because it sinks in) and the next two light.
And that's it! You've just tied up the first Salmon fly pattern; the Grub.
Pocono
Last edited: