Furled Leader Jig - The Build

citationsquirrel

Well-known member
Messages
320
Reaction score
3
Location
Anoka, MN
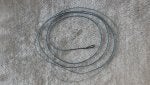
As you may recall, I decided a while back that I would make myself a furled leader jig so that I could start making furled leaders during our long Minnesota winters, along with tying flies. So, I did some online research and downloaded a lot of articles. Then I procrastinated for a while. :D This past week I did some more thinking on my design and this weekend I purchased a few of the supplies that I’ll need and actually started. I thought I would document the build here for everyone to enjoy. So, I’ll post some details and pictures as I go along. I think I have a couple original design ideas to share. It is going to be a bit of a lengthy process because, (1) I’m in no hurry, (2) I’m hoping to have my son help me with a few of the steps, (3) I’m not expecting to have a long time period that I can dedicate to the project – more like 15 or 20 minutes here and there when I get a chance, and (4) fine craftsmanship takes time. ;)

The first thing I started with was the pegs. For this I’m using a 1” dowel. I need five pegs. I cut myself five pieces at 4¼” long. All of the plans I found suggested using 4” pegs, but I figured after I got done with my sanding, they would be somewhere in between. I used a handsaw to cut them, so their bases were not all exactly level. So, I’m sanding the bases to level them off. After all, I don’t want to have crooked pegs. I’m also sanding the tops of the pegs. This will give me a nice smooth and rounded top for all my pegs. I have one peg currently done and am going to be working on the other four.

Will our hero survive? Will all the pegs have rounded tops? Tune in next time as our adventure continues. :)
 

citationsquirrel

Well-known member
Messages
320
Reaction score
3
Location
Anoka, MN
Previously on Building a Furled Leader Jig ... see above.

Well, after about a month of doing very little except some sanding of my pegs, I decided to spend my Labor Day actually working a bit on my jig. I had purchased a 10' long 1x6 at Home Depot a couple weeks back, so I started by cutting that to size. According to the plans I'm using, my furthest peg will end up being 112" out, so I added two more inches and cut off the rest of the board.


I then took that little extra piece of board, sawed off about an inch and a half, which left me about a 6" long piece of board. This I made into my end piece and I screwed that into my 114" main piece of board.


I then added my two cup hooks onto my end piece.


After that, I measured and marked all the peg locations on main board. I then drilled 1/4" holes for all the peg locations. Since I'll have three main lengths (8', 10', and 12'), I had 15 holes.


I put my main board back up in the rafters of my garage (about the only place I can store something that long). I went back to work on my pegs. I started by taking a peg and drilling a 1/4" hole in the center of the bottom (the non-rounded end) of the peg about 3/4" deep.


That is about as far as I got. So, you'll have to tune in again to find out where I go from here. I've got what I think is a pretty cool idea for my pegs. I'll let the suspense build. Hopefully, I won't take so long for my next update. :D
 

citationsquirrel

Well-known member
Messages
320
Reaction score
3
Location
Anoka, MN
No, I'm really not that slow. But, with my daughter's swimming season in full swing and a couple emergency home repair projects, my leader jig has seen no further action. Things should slow down soon and then I'll get back to work.
 

tanglehead

Well-known member
Messages
53
Reaction score
0
Location
North Bay
Hey citationsquirrel,

Thanks for posting all those photos, I'm pretty much parallel to you in terms of latitude, so a long winter is in the mix and I've been thinking of building the same kind of jig. Looking forward to reading more about your progress, looks like one heck of a fun project! Go Vikes...
 

mcnerney

Administrator
Messages
20,615
Reaction score
319
Location
Pinedale, WY
Hey citationsquirrel,

Thanks for posting all those photos, I'm pretty much parallel to you in terms of latitude, so a long winter is in the mix and I've been thinking of building the same kind of jig. Looking forward to reading more about your progress, looks like one heck of a fun project! Go Vikes...
I agree, this looks like a really fun winter project, I'm looking forward to how you proceed.
 

citationsquirrel

Well-known member
Messages
320
Reaction score
3
Location
Anoka, MN
Well, I'm back again with an update. I haven't gotten much done. December is a busy time in our house. In addition to the normal holiday rush and kids Christmas activities, we also have some birthdays thrown in for good measure. So, there isn't a lot of time for me to putter about in the garage working on my "strange new hobby." ;)

I wanted to take this update to share what I think is probably the coolest part of my build. Since I'm setting up my jig for three different lengths (8', 10', and 12'), I wondered how I would attach my dowels to my jig. Obviously I didn't want to "permanently" attach them, because I needed to be able to move them. At the same time, I didn't want to make them so movable that they weren't solid. As you'll remember, I had just finished drilling holes in the bottom of my dowels. My idea, was to put threaded inserts in the bottom of the dowels. This will allow me to "bolt" my pegs to the jig. But, with a simple socket set, I'll be able to "un-bolt" my pegs, adjust the length, and "bolt" everything back down. I don't know if I'm the first guy to think of this (probably not), but I thought it was a pretty cool idea.

So, I just took my dowel with the hole I had drilled ...


... used an allen wrench to insert my threaded insert into the dowel ...


... and make sure the threaded insert was flush with the bottom of the dowel.


I'm getting close to the end. I just need to tinker a little more with it. I'm also going back and rereading (in much greater depth) all my materials on making leaders. Hopefully I'll have a finished jig to show everyone soon.
 

roachm

Well-known member
Messages
125
Reaction score
2
Location
East Tennessee
Looking forward to the finished jig. I'm going to do this before spring. I've never fished a furled leader but for the investment its hard not to try a few. (I have most all the stuff needed laying around the house). Thanks for sharing the process.

Sent from my XT907 using Tapatalk
 

citationsquirrel

Well-known member
Messages
320
Reaction score
3
Location
Anoka, MN
Believe it or not, I finished my jig this weekend! I marked all of my peg holes. I have holes for 8', 10', and 12' leaders. Then I mounted all my pegs (then I took it all apart, to make sure it works good). As you'll recall, I put threaded inserts into my pegs. This allows my pegs to be secure, yet movable. They worked like a charm.

The first pic is of the back of my jig, with a peg bolted in.


The last pic shows the completed jig.


Now I can start building leaders. I just hope they don't take as long as building the jig took. :D
 

plecain

Well-known member
Messages
3,362
Reaction score
592
Location
NH
Looks nice.

Mine is functional, but not nearly as elegant as yours.

If you don't know about it already, there's a British site with more furled leader information than you'd believe existed.

It's here: Login Required | Furled Leaders

You have to register, but it's free.
 

onemississipp

Well-known member
Messages
1,365
Reaction score
50
Location
Tupelo, MS
I probably shouldn't tell on myself...but for two days I just not could figure out how....making all those loops then taking them off the pegs...one did not just end up with a single thread again....lol

Laugh it up, fellas!

I got it now! So simple...lol
 

fredaevans

Well-known member
Messages
11,186
Reaction score
126
Location
White City (tad north of Medford) Oar-E-Gone
Looks nice.

Mine is functional, but not nearly as elegant as yours.

If you don't know about it already, there's a British site with more furled leader information than you'd believe existed.

It's here: Login Required | Furled Leaders

You have to register, but it's free.
Love furled leaders, a new site to me .... took me all of 45 seconds to bookmark the place. :army: Back there later when I have an hour to kill.:D

fae

---------- Post added at 10:08 AM ---------- Previous post was at 10:06 AM ----------

It actually works!

Suspect you'll love using a FL, they're the 'bee's knee's' for longer leader lay outs in low clear water.

fae
 

JRT

Active member
Messages
44
Reaction score
38
I like the adjustable pegs on your jig so you change the tapers and length. I built a jig but for my saltwater fluoro leaders. I then bought a 'machine' from Eclecticangler which definitely helped. I'm now doing much more river fishing so I'm thinking of building a new jig that I can make dryfly leaders and saltwater leaders.
 

FlyFlinger2421

Well-known member
Messages
656
Reaction score
89
Location
Timbukto
Well, another winter is upon us! I built a jig this week and aafter breaking a leader or two and screwing up a few more, I finally just about have it figured out. I have tried different material and hit on one that seems perfect. Has anyone tried Spectra? Spin fishermen use it and it is also used to make archery strings. The stuff is very difficult to cut and seems like it will last forever. The 6# Spectra has a diameter of 0.6mm.
What do you guys think about Spectra?
 

FlyFlinger2421

Well-known member
Messages
656
Reaction score
89
Location
Timbukto
Wrong diameter. Should have been 0.06mm or 0.002".
Here is a 6'8" leader I made out of 4lb braided Spectra (Dyneema) which has a diameter of 0.05mm. The completed leader has a break strength of 12lb and has shorb loops at both ends. I can flip it with my arm and get nicely formed loops that roll out straight just like my fly line! Can't wait to try these next spring! There is no hinge between the leader and the fly line either! If any one is interested I can tell you some things I learned from several videos I found on the web as well as modifications I made to the procedures. It is really quite simple once you figure it out and I can make a leader now in about 15 minutes.P1171405.JPG
 

80302

Well-known member
Messages
1,759
Reaction score
1,867
Wrong diameter. Should have been 0.06mm or 0.002".
Here is a 6'8" leader I made out of 4lb braided Spectra (Dyneema) which has a diameter of 0.05mm. The completed leader has a break strength of 12lb and has shorb loops at both ends. I can flip it with my arm and get nicely formed loops that roll out straight just like my fly line! Can't wait to try these next spring! There is no hinge between the leader and the fly line either! If any one is interested I can tell you some things I learned from several videos I found on the web as well as modifications I made to the procedures. It is really quite simple once you figure it out and I can make a leader now in about 15 minutes.View attachment 46415
I posted to your other thread.
Looks like you figured it out! Nice work.
 
Top