
swirlchaser
Well-known member
Hey guys,
I figured I'd put up a SBS to take some mystery out of decorative wraps. It's really not that hard once you get started. There are only two ways you can wrap a thread onto a rod, in an "X" pattern or in a "box" pattern. because of this limitation, the squence, color, and spacing is what makes your pattern.
1. Choose a pattern. This one is the 4 point star with the two color variation.
2. Decide how long the wrap will be. I want 200mm of finished wrap so I will use a 250mm work area to allow for tying off.
3. I use a thread basewrap. I feel it holds the thread better and it makes it easier to mark up the spacing.
4. I use a piece of masking tape to find the circumference of the blank in three places. You can measure the diameter and calculate it that way but the tape will serve another purpose.
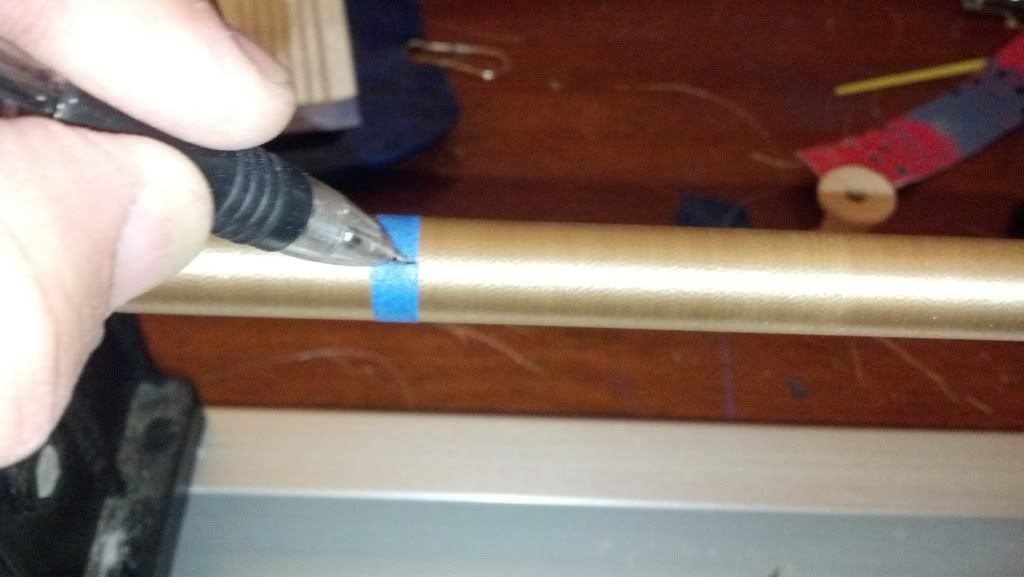
5. Remove the tape and measure all three pieces.The center circumference is what I will use for the spacing of the wrap. Divide the but and tip end into 4 equal parts.
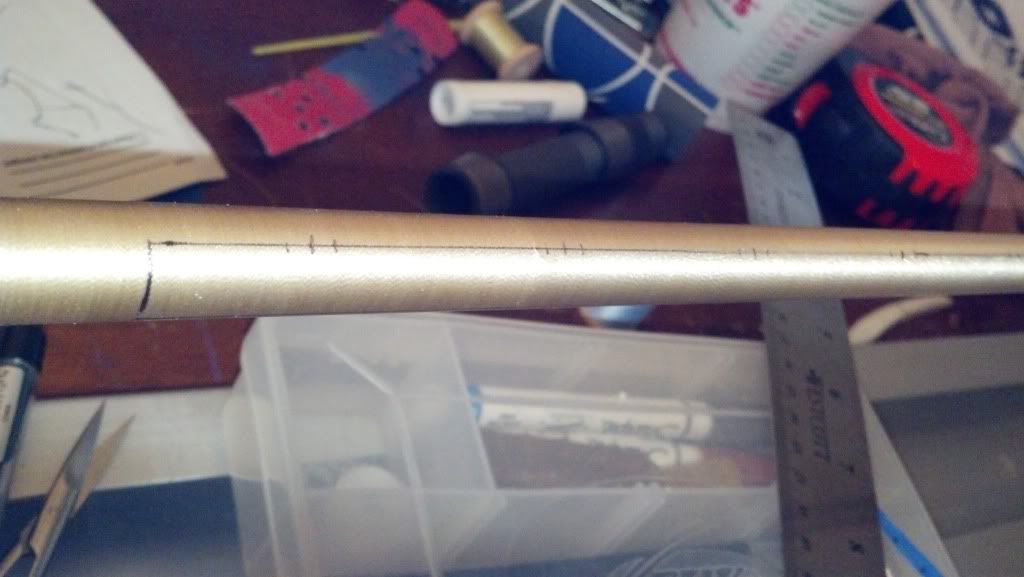
6. Place the tape back on the blank, making sure one of the marks is on the spline of the rod.
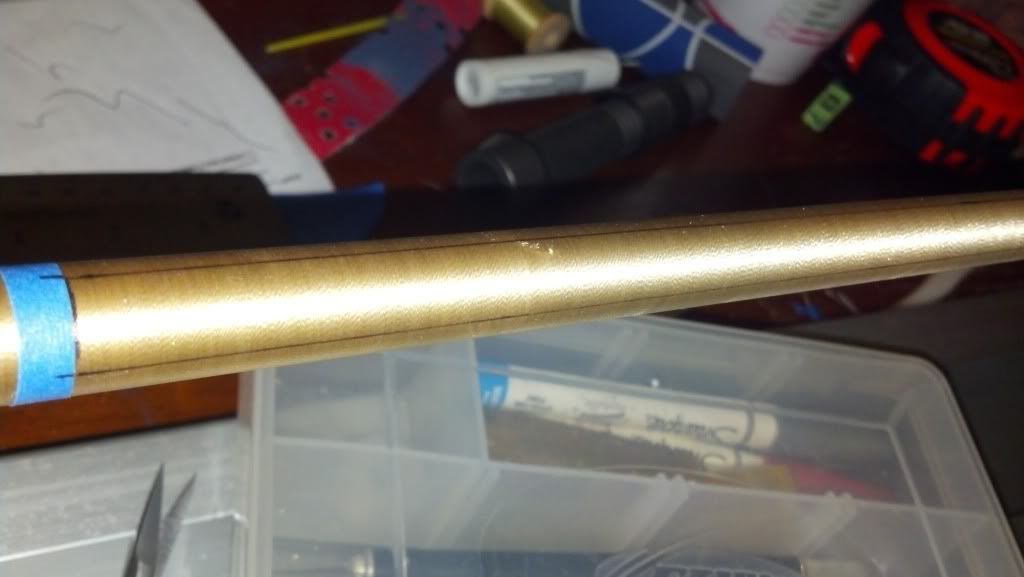
This particular wrap is a single axis wrap. This means I would only need the 0 and 180 lines but I always mark up all four. There have been times when half way through a wrap I decided to add anothe pattern on the 90 and 270 lines. Here is the blank marked up. I decided to make 8 passes on this pattern so the star will be pretty large. You can see the centers marked and also the 2.5mm marks on either side of center to start the pattern.
OK, we're ready to start wrapping. I will be doing 9 passes here. In each pass I will be wrapping an "X" in silver towards the left, an "X" in black towards the right an 4 threads in blue in a box around the X pattern. To add to the pattern I will be fading 5 shades of blue in the backround pattern. This is the first pass.
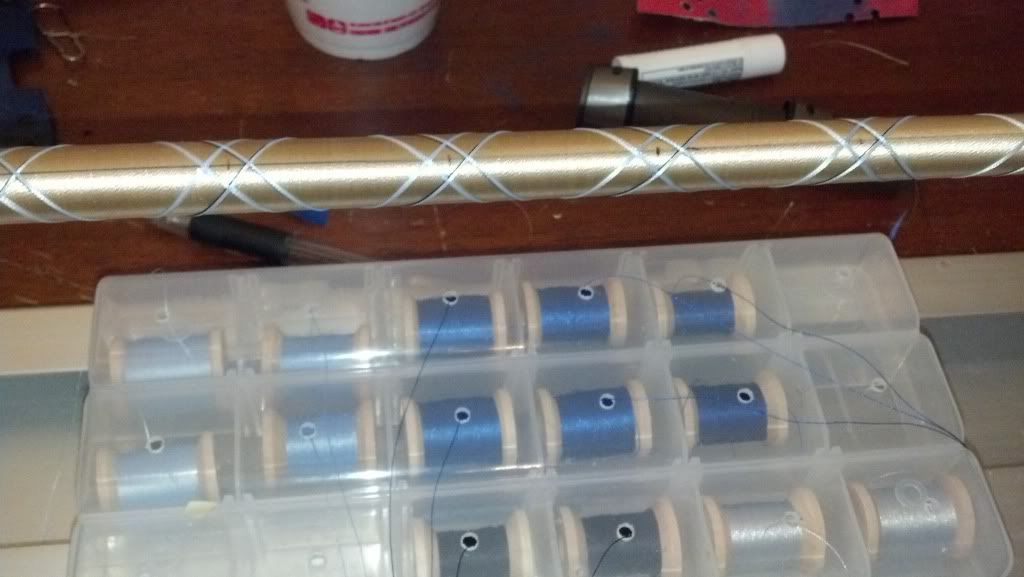
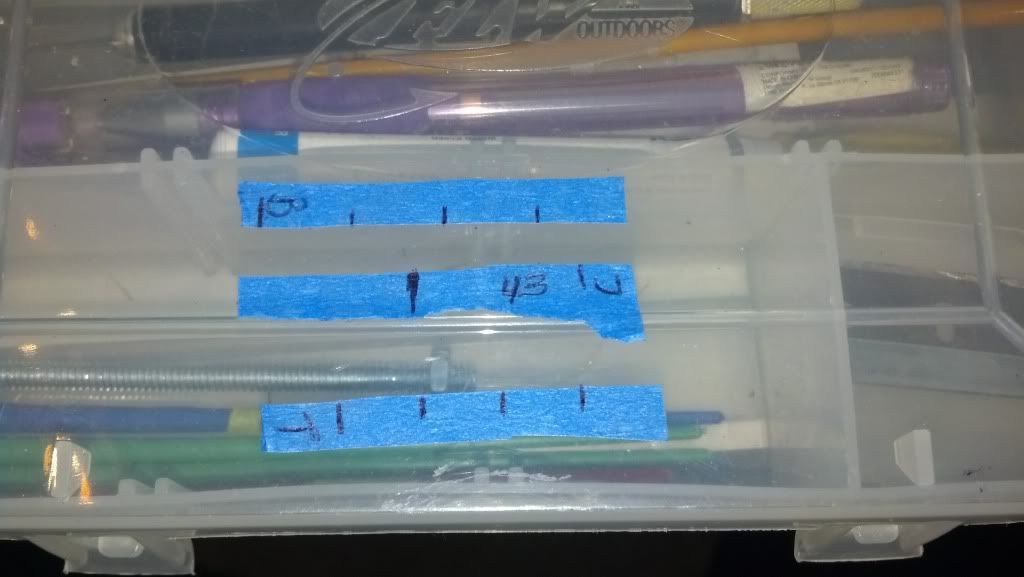
You can see my thread box on the table. I transfer thread to smaller wooden spools so that I can put down multiple threads at once when I can. The box makes managing 14 spools of thread easier.
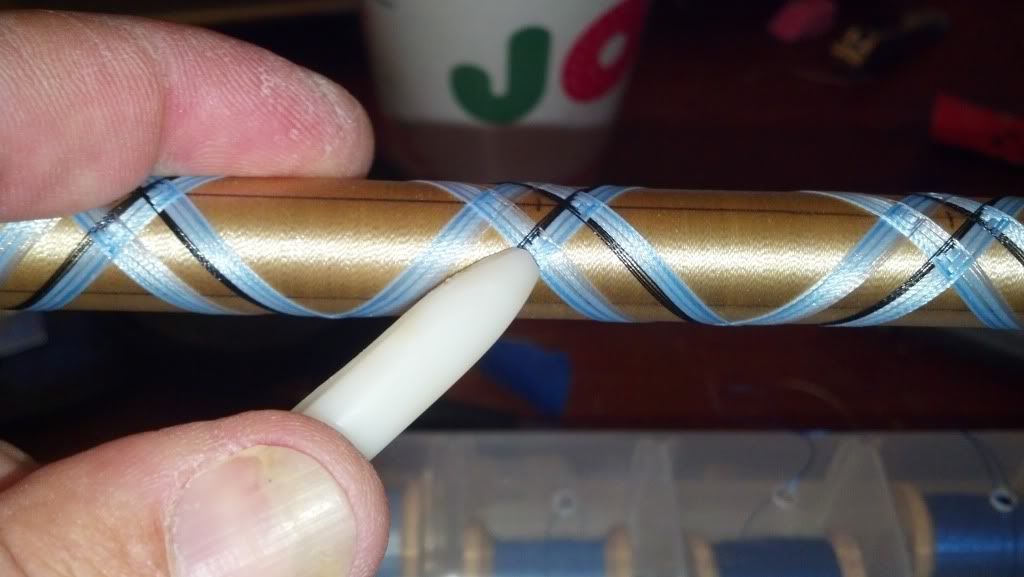
Here we are with 3 passes done and starting on the 4th. I stop every 15-20 threads to pack the threads and make sure the pattern stays square. In this pic I'm packing the pattern as it comes together. It is important that you stop every so often to make sure the wraps are staying on center. If you wait too long it become very difficult to shift threads.
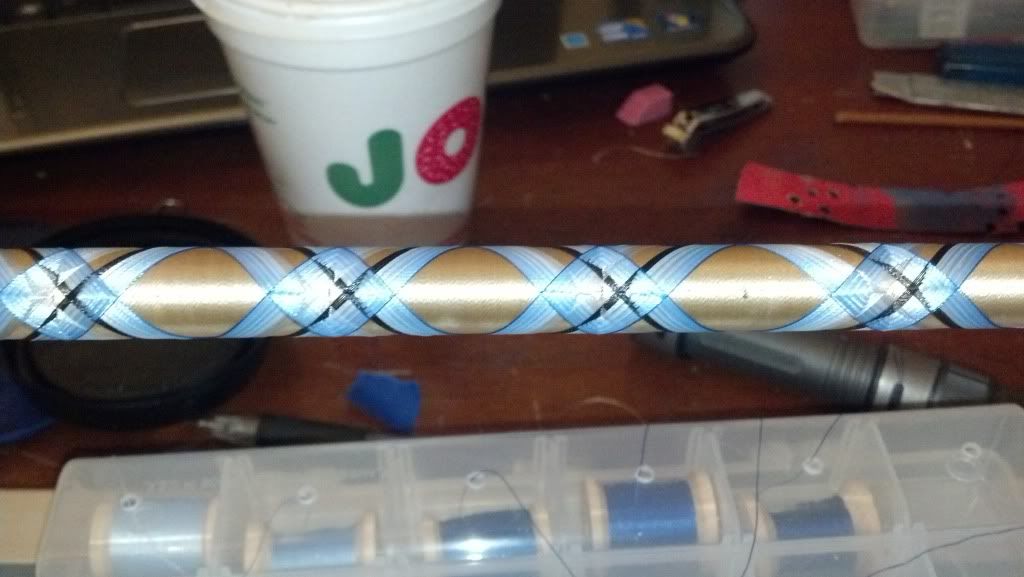
Here we are 5 passes in and I'm introducing the third shade of blue into the backround.
This is 8 passes in. As you can see it's time to do some more packing. My measurements seem to have been a bit off since it looks like 9 passes isn't going to close this out so we'll have to put in a few more.
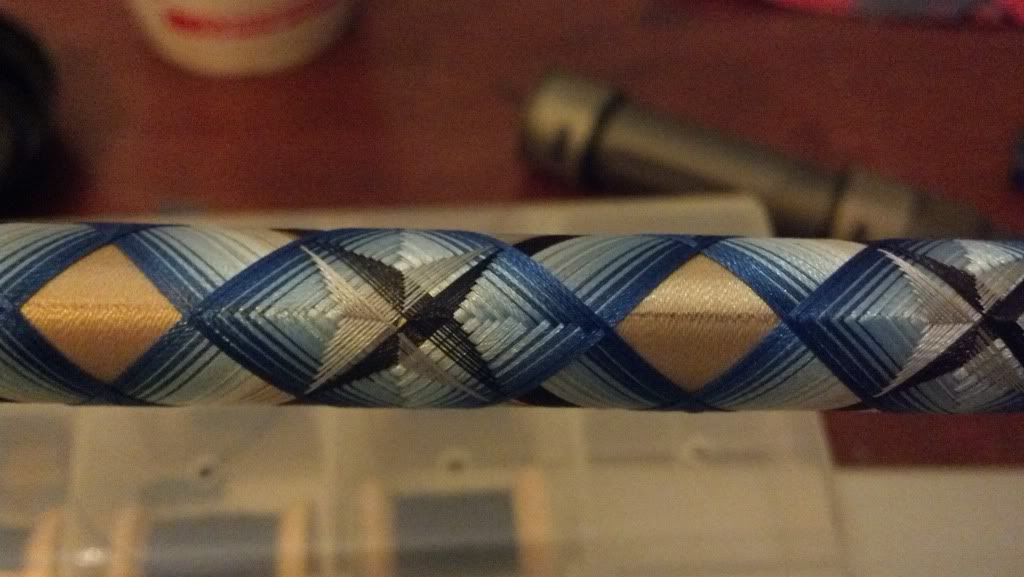
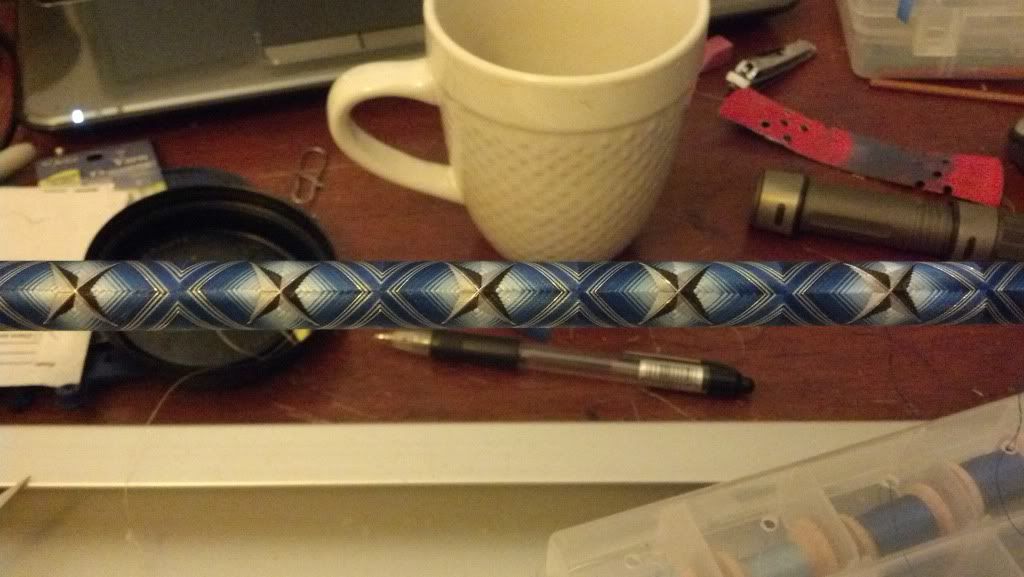
Here we are at 10 passes with some silver and grey metallics put in to finish up the star. I continued the backround pattern to close up the wrap and frame the star.
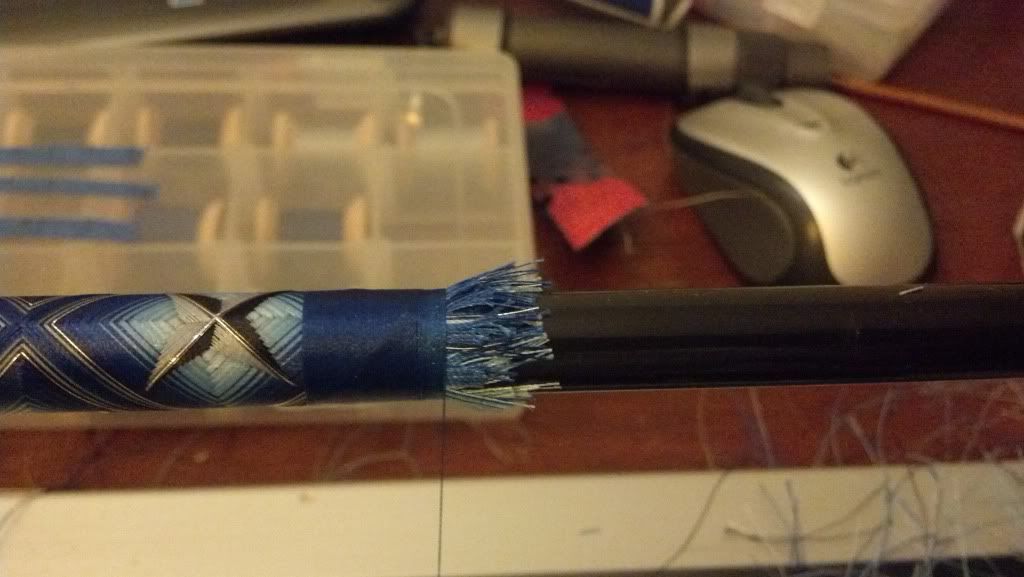
After a coat of color preservative I start the tie off.

For a smooth tie off do not cut all the threads the same length. Taper the threads so you have a smooth taper to wrap over
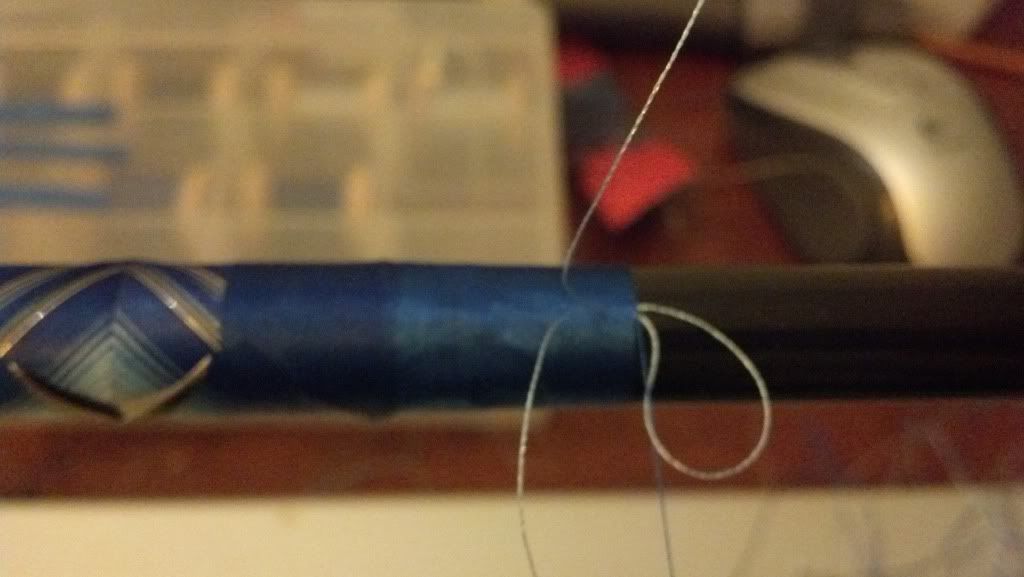
Lock down your thread and your ready for a second coat of CP, then finish!")
Hope this helps some of you who are on the fence about trying this out.
I figured I'd put up a SBS to take some mystery out of decorative wraps. It's really not that hard once you get started. There are only two ways you can wrap a thread onto a rod, in an "X" pattern or in a "box" pattern. because of this limitation, the squence, color, and spacing is what makes your pattern.
1. Choose a pattern. This one is the 4 point star with the two color variation.
2. Decide how long the wrap will be. I want 200mm of finished wrap so I will use a 250mm work area to allow for tying off.
3. I use a thread basewrap. I feel it holds the thread better and it makes it easier to mark up the spacing.
4. I use a piece of masking tape to find the circumference of the blank in three places. You can measure the diameter and calculate it that way but the tape will serve another purpose.
5. Remove the tape and measure all three pieces.The center circumference is what I will use for the spacing of the wrap. Divide the but and tip end into 4 equal parts.
6. Place the tape back on the blank, making sure one of the marks is on the spline of the rod.
This particular wrap is a single axis wrap. This means I would only need the 0 and 180 lines but I always mark up all four. There have been times when half way through a wrap I decided to add anothe pattern on the 90 and 270 lines. Here is the blank marked up. I decided to make 8 passes on this pattern so the star will be pretty large. You can see the centers marked and also the 2.5mm marks on either side of center to start the pattern.
OK, we're ready to start wrapping. I will be doing 9 passes here. In each pass I will be wrapping an "X" in silver towards the left, an "X" in black towards the right an 4 threads in blue in a box around the X pattern. To add to the pattern I will be fading 5 shades of blue in the backround pattern. This is the first pass.
You can see my thread box on the table. I transfer thread to smaller wooden spools so that I can put down multiple threads at once when I can. The box makes managing 14 spools of thread easier.
Here we are with 3 passes done and starting on the 4th. I stop every 15-20 threads to pack the threads and make sure the pattern stays square. In this pic I'm packing the pattern as it comes together. It is important that you stop every so often to make sure the wraps are staying on center. If you wait too long it become very difficult to shift threads.
Here we are 5 passes in and I'm introducing the third shade of blue into the backround.
This is 8 passes in. As you can see it's time to do some more packing. My measurements seem to have been a bit off since it looks like 9 passes isn't going to close this out so we'll have to put in a few more.
Here we are at 10 passes with some silver and grey metallics put in to finish up the star. I continued the backround pattern to close up the wrap and frame the star.
After a coat of color preservative I start the tie off.
For a smooth tie off do not cut all the threads the same length. Taper the threads so you have a smooth taper to wrap over
Lock down your thread and your ready for a second coat of CP, then finish!
Hope this helps some of you who are on the fence about trying this out.
Last edited: