5-Weight Revamp

random user

Well-known member
Messages
580
Reaction score
9
Location
S. E. Taxachusetts
I'm posting this up because I am looking for advice, tips, trick, etc that people are willing to share.
(No need to be gentle with liberal application of The 2x4 o' Enlightenment.)

This is bid 1 for me. Started by stripping a 8'6" Pflueger 5 weight that the only thing I am really sure of is that it was well used by 1994.

These are the first wraps for me. Thread is rayon embroidery thread.


Not the most glorious of victories, but it's a win for me - guide is super tight.

Color choices weren't so well thought out. Will probably change up to a dark and light olive or something similar.

Probably should have started with the tougher "A" nylon instead of the more fragile rayon. Skipping the trim bands the first time around might have been a good idea too, but an ugly win is still a win.
 
Last edited:

badfish creek

Active member
Messages
40
Reaction score
4
Location
Charlotte, NC
Please do a test with your wrap epoxy before you get any father along using this thread. Most embroidery thread has silicone or some other type of lube on it. This will cause massive fisheyes in your epoxy.
 

Rip Tide

Well-known member
Messages
11,147
Reaction score
3,506
Location
quiet corner, ct
Don't wrap those guides in too tight
After you get them all on you're going to have to make sure that they're all lined up straight. For that you're going to need a little wiggle room.
 

swirlchaser

Well-known member
Messages
2,062
Reaction score
49
Location
Parlin, NJ / Staten Island, NY
Please do a test with your wrap epoxy before you get any father along using this thread. Most embroidery thread has silicone or some other type of lube on it. This will cause massive fisheyes in your epoxy.
I use embroidery thread almost exclusively, both with and without color preservative. The trick is to make sure your first coat is very light, barely covering the thread. Embroidery thread does have some silicone in i to help it run through the machinery but it's only a factor if you put on a heavy first coat on.
 

random user

Well-known member
Messages
580
Reaction score
9
Location
S. E. Taxachusetts
Don't wrap those guides in too tight
After you get them all on you're going to have to make sure that they're all lined up straight. For that you're going to need a little wiggle room.
I've been struggling with that. keeping them lined up perfectly. What you're saying makes a lot of sense, but I thought what caused the guides to spiral around the blanks was loose wraps. So, I am guessing it is some elusive balance of just loose enough and not too tight.

---------- Post added at 08:02 PM ---------- Previous post was at 07:49 PM ----------

I do have a question on this for which I could use some experienced advice.

Guide sizes:
Bought a Hook& Hackle set: 12, 10, 3, 3, 2, 2, 1, 1, 1.

These are looking a little tight to me for a 5-weight. Most other sources I have come across seem to go a little larger.

The other side I have seen is from the St. Croix site: 12, 4, 4 ,4, 4, 3, 3, 3, 3.

I'm going to be ordering some "A" nylon because the rayon is just too delicate for me to work right now, and I have enough to be paying attention to. I keep snapping the thread because the spool tension sometimes gets suddenly too tight. Should I order some larger guides?
 

petee

Well-known member
Messages
320
Reaction score
8
Location
Central Coast of Calif
Like most things in rod building, you will never get concenus on guide sizing. However for me.... the sizes you have should be plenty good for a 8'6" 5 wt. I do know that Tom Morgan goes even smaller with his guide sizes.

Sent you a PM.

Pete
 

swirlchaser

Well-known member
Messages
2,062
Reaction score
49
Location
Parlin, NJ / Staten Island, NY
Like most things in rod building, you will never get concenus on guide sizing. However for me.... the sizes you have should be plenty good for a 8'6" 5 wt. I do know that Tom Morgan goes even smaller with his guide sizes.

Sent you a PM.

Pete
What he said^^^
I normally lean towards larger guides but I don't thing it has a measurable effect on casting my reasons are more practical:
1. Smaller guides ice up faster in the winter
2. I fish alot of shooting heads and passing loop-to-loop connections through a size 1 is a PITA
3. I HATE wrapping on a size 1 guide, I have fat fingers and I always end up cursing up a storm :ranting3:
 

random user

Well-known member
Messages
580
Reaction score
9
Location
S. E. Taxachusetts
You mean it is going to get worse as I work down the blank?

I am getting pretty good at the #12 and #10 stripper guides. Not completely satisfied yet.

Rewrap, recheck, reunwrap, rewrap, recheck, reunwrap, rewrap, recheck, reunwrap, rewrap, recheck, reunwrap, ad nausium.

I thought they guide set was a bit tight, but passable. I have bigger things to worry about right now. Worst case is I get to to it all again. This is a learning attempt for me, so I'll learn.
 

swirlchaser

Well-known member
Messages
2,062
Reaction score
49
Location
Parlin, NJ / Staten Island, NY
You mean it is going to get worse as I work down the blank?

I am getting pretty good at the #12 and #10 stripper guides. Not completely satisfied yet.

Rewrap, recheck, reunwrap, rewrap, recheck, reunwrap, rewrap, recheck, reunwrap, rewrap, recheck, reunwrap, ad nausium.

I thought they guide set was a bit tight, but passable. I have bigger things to worry about right now. Worst case is I get to to it all again. This is a learning attempt for me, so I'll learn.
Lol, wrapping a size 1 at the tip of a fly rod blank is the stuff dreams are made of. Said no one, ever!
 

random user

Well-known member
Messages
580
Reaction score
9
Location
S. E. Taxachusetts
I think I am cheating on my trim wraps. How bad is this?

Have been getting the thread locked onto the rod and turning on a total of five turns.

Still have the tag of the primary color laying against the blank.

I have been laying the trim wrap thread against the rod, and turning the primary thread over it a few times and then pulling the trim wrap thread and slipping the tag in under the primary thread wraps (i.e. not cutting the trim wrap thread tag end, just tugging it under the existing wraps.)

From there I get 9 wraps of the primary thread onto the rod, over the tag of teh primary thread and over the trim wrap thread. At this point I and trimming off the tag of the primary thread and then wrapping on one more turn.

Now I pick up the trim thread and wrap inside the primary thread, carrying the primary thread under the trim thread for 5 turns. Then lay the trim thread against the rod again and continue on with the primary thread, carrying the trim thread under the primary thread tight against the rod.

Have been continuing one this way until it is time for the second trim band.

With the second trim band I repeat the process for the first trim band.

One the trim band has been wrapped inside the primary thread I have been laying it against the blank and laying in a loop of mono.

Have been running 8 turns of the primary thread over it, then trimming of the tag of the trim thread. Then doing two more turns of the primary thread.

Then I have been pinching the thread tight, clipping it and slipping the new tag threw the mono loop and pulling it back under the wraps and trimming off wher it emerges back outside the wraps.

This way I only have to lock one thread off on the rod and have only one tag to trim tight to the warps.

Is this a bad thing or is it a good way to do it?

Not so sure the description is clear. I can do photos if necessary.

Basically, it seems easier, so I am assuming it may not be the best approach.

Any suggestions?

Oh, another silly question. I can use an index card and a popcycle stick to mix up the wrap epoxy, right?

Thanks much.
 

petee

Well-known member
Messages
320
Reaction score
8
Location
Central Coast of Calif
There is no one way to do anything rod building correctly. If it works for you and you get the look you like.... go for it.

Index card and popcicle to mix the rod finish? Short answer: No. Thread finish is much thinner than regular two part epoxy. Imagine trying to keep a milk shake on an index card, pretty close to the same consistency. I mix mine in a small cup, like the dose cup off a Nyquil bottle, after everything is wiped down with alcohol. Then I will pour it on some cupped foil to allow it to spread out.

Letting it spread does a couple of things:
1) Its easier to blow on and pop the bubbles that can form when you mix.
2) Being spread out slows the chemical process allowing for a longer pot life.

Pete
 

Rip Tide

Well-known member
Messages
11,147
Reaction score
3,506
Location
quiet corner, ct
Then I will pour it on some cupped foil to allow it to spread out.

Letting it spread does a couple of things:
1) Its easier to blow on and pop the bubbles that can form when you mix.
2) Being spread out slows the chemical process allowing for a longer pot life.
3) It's important that you don't throw that little cup away when you're done
Saving it will keep you from touching and leaving your fingerprint on the rod when you check to see if the finish is dry yet :rolleyes: (and this is inevitable)
 

random user

Well-known member
Messages
580
Reaction score
9
Location
S. E. Taxachusetts
Thanks.
Wraps are wraps, I guess. If they are neat, tight and secure then they are good. I guess how you get there isn't so important.

Found some "Nut Cups" at the local craft store. (Big mistake going in there - after over an hour I walked out with a couple more project/experiments and some 5mm doll eyes.) They seem kind of large but I guess they will be okay.

Part of the reason I have always used index cards for epoxy is for their ability to gather fingerprints.

This is turning into the ever increasing slope learning curve.
 

random user

Well-known member
Messages
580
Reaction score
9
Location
S. E. Taxachusetts
Got a bit of work done. Have the hook keeper and the #12 and #14 stripper guides wrapped on. Probably shouldn't have done it when I was a tired as I was. Not the best wraps I have done, but they are good enough. I know what the flaws are and know how to correct them, so they are staying. This is a learning experience for me. - looking for effective more so than purdee. As a reference point, I have maybe 20 stripper guides completed, so there is a lot to be gained for me through practice.

Hook Keeper


#12 Stripper Guide


#14 Stripper Guide


Alignment


Not the greatest of pics, but I am still figuring out the new camera.
 

williamhj

Well-known member
Messages
3,363
Reaction score
79
Location
Denver CO
Looks like progress! When you mix up the finish personally I'd stay away from a popsicle stick. The wood has the potential to pick up contaminates that could impact the clarity of the finish. I use the plastic butt end of a cheap disposable brush to mix mine and mix it in a plastic medicine cup (be sure they are clean). I have used sable brushes for finish and then cleaned them but often just use the cheap brushes you can get at a hobby store. I cut the bristles shorter and at a bit of an angle. As others said, keep the left over finish and the brush since it will let you test how the finish is curing without touching the wraps. Then I keep the brush and use the end to mix up the next batch :)
 

swirlchaser

Well-known member
Messages
2,062
Reaction score
49
Location
Parlin, NJ / Staten Island, NY
I think I am cheating on my trim wraps. How bad is this?

Have been getting the thread locked onto the rod and turning on a total of five turns.

Still have the tag of the primary color laying against the blank.

I have been laying the trim wrap thread against the rod, and turning the primary thread over it a few times and then pulling the trim wrap thread and slipping the tag in under the primary thread wraps (i.e. not cutting the trim wrap thread tag end, just tugging it under the existing wraps.)

From there I get 9 wraps of the primary thread onto the rod, over the tag of teh primary thread and over the trim wrap thread. At this point I and trimming off the tag of the primary thread and then wrapping on one more turn.

Now I pick up the trim thread and wrap inside the primary thread, carrying the primary thread under the trim thread for 5 turns. Then lay the trim thread against the rod again and continue on with the primary thread, carrying the trim thread under the primary thread tight against the rod.

Have been continuing one this way until it is time for the second trim band.

With the second trim band I repeat the process for the first trim band.

One the trim band has been wrapped inside the primary thread I have been laying it against the blank and laying in a loop of mono.

Have been running 8 turns of the primary thread over it, then trimming of the tag of the trim thread. Then doing two more turns of the primary thread.

Then I have been pinching the thread tight, clipping it and slipping the new tag threw the mono loop and pulling it back under the wraps and trimming off wher it emerges back outside the wraps.

This way I only have to lock one thread off on the rod and have only one tag to trim tight to the warps.

Is this a bad thing or is it a good way to do it?

Not so sure the description is clear. I can do photos if necessary.

Basically, it seems easier, so I am assuming it may not be the best approach.

Any suggestions?

Oh, another silly question. I can use an index card and a popcycle stick to mix up the wrap epoxy, right?

Thanks much.
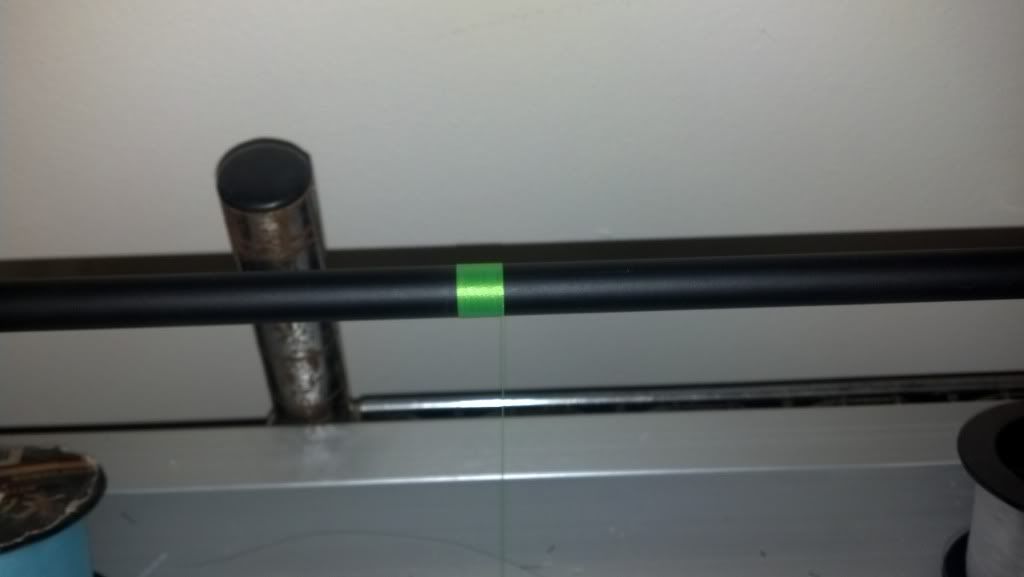
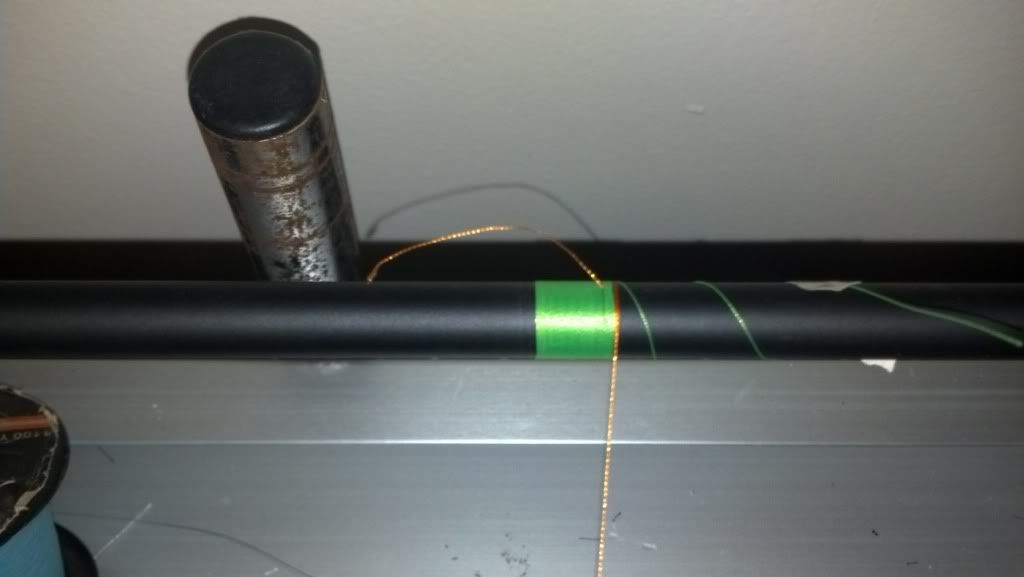
There is a better way (if I'm reading this correctly). You don't have to lock down the thread to start a trim band, the overlap will show and if your doing very thin bands (1-4 threads) it's very difficult to keep it from slipping. Use the main thread to lock down the trim band thread. When your done with the band lock down the main thread again and keep moving. Hopefully these pics will help.

MAIN THREAD


Insert band thread. It helps if you tape the far end of this thread to the rod so it doesn't wrap around the blank.


Put 4-6 wraps over the trim thread, then run the main thread off to the side, tape it to the blank and cut it. Now trim thread is locked down on one side and you can even do a 1 thread band if you want. When the trim band is the size you want run it off to the side and start your main thread again.


---------- Post added at 11:46 PM ---------- Previous post was at 11:45 PM ----------

If you want to do multiple color bands there's another method. If you want to see it just let me know and I'll snap a few pics.

---------- Post added at 12:09 AM ---------- Previous post was Yesterday at 11:46 PM ----------

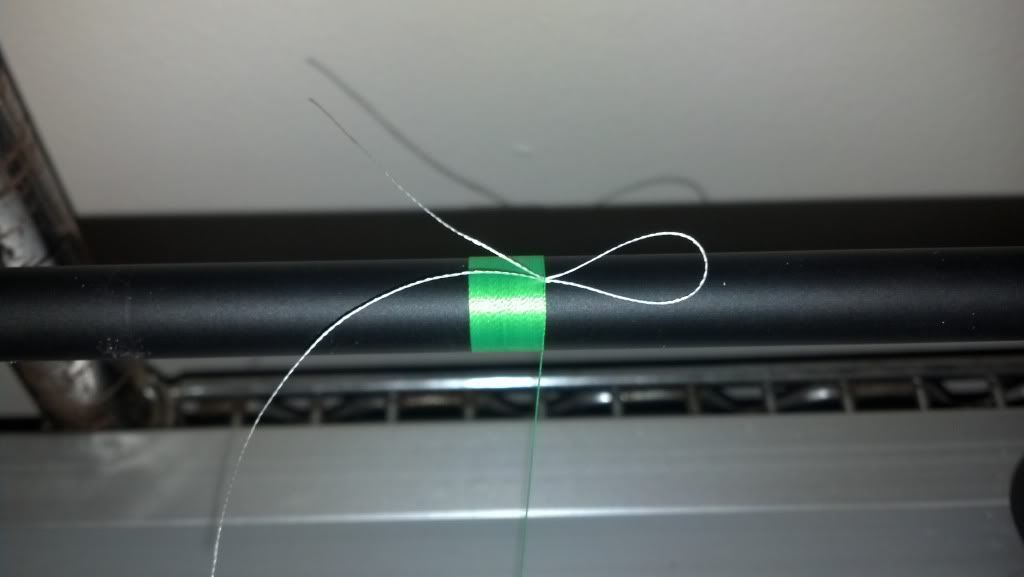
I figured I might as well, I was already at the bench. In this method you insert pull loops under the main thread.


If your using multiple loop DO NOT put them under the same pass. Run atleast two passes of main thread before inserting another loop.


At this point insert your trim band thread into the first loop and pull it through, it will be locked down as soon as you pull it through. This is the best way to do thin trim bands with multiple colors.
 

random user

Well-known member
Messages
580
Reaction score
9
Location
S. E. Taxachusetts
swirlchaser,

Thanks. I am getting a slight ridge all through the wrap the way I am doing it. I can live with it for now.

If I got my brain around what you were demonstrating above, the process is sort of passing of tension from one thread to the next, which makes sense now.

The difficult parts when I am not tired are getting the thread locked on in the first place. It tends to want to spiral itself off if I am below 3 rotations.

Need to do some more work to my rig as well. Just not happy with it and tired of fighting with it. It works, but not well. Need to add in the ability to keep a second thread tensioned too.

What blank is that? Am already looking at blanks for the next project and I am having a hard time finding one that is just finished (un-colored) graphite. Would really like a 2 piece dark grey, but black is close enough.
 

swirlchaser

Well-known member
Messages
2,062
Reaction score
49
Location
Parlin, NJ / Staten Island, NY
swirlchaser,

Thanks. I am getting a slight ridge all through the wrap the way I am doing it. I can live with it for now.

If I got my brain around what you were demonstrating above, the process is sort of passing of tension from one thread to the next, which makes sense now.

The difficult parts when I am not tired are getting the thread locked on in the first place. It tends to want to spiral itself off if I am below 3 rotations.

Need to do some more work to my rig as well. Just not happy with it and tired of fighting with it. It works, but not well. Need to add in the ability to keep a second thread tensioned too.

What blank is that? Am already looking at blanks for the next project and I am having a hard time finding one that is just finished (un-colored) graphite. Would really like a 2 piece dark grey, but black is close enough.
Yup, it's very difficult to lock down a thread with only 2-3 passes. If you use the pull loop method there's no need to lock the thread down.
 

random user

Well-known member
Messages
580
Reaction score
9
Location
S. E. Taxachusetts
Figured that was part of my issue. Am just trying to work too tightly for my experience level.

What I have been trying for in an initial 10 wraps of the primary thread then 5 wraps of the trim band thread and reversing this on the inside. Surprisingly on the inside, close to the guide, is actually easier.

I sure it can be done, but I am not there, YET.
 
Top